Build an XMTP "hello world" app
XMTP (Extensible Message Transport Protocol) is an open protocol and network for secure and private web3 messaging. For example, you can build an app with XMTP to send messages between blockchain accounts, including chat/DMs, alerts, announcements, and more.
Use this tutorial to build an XMTP "hello world" messaging app. Building this app can help you learn some of the fundamental concepts involved in building with XMTP.
As its name implies, the XMTP "hello world" app is intentionally barebones. Here's what the app enables you to do:
Connect your wallet app to the "hello world" app:
Connect your blockchain account to the XMTP network using your wallet app.
Send a preconfigured "gm" message to an XMTP message bot and receive a reply from the bot.
The app includes only the code required to accomplish these steps and little else. This helps keep the codebase relatively bite-sized so that developers of all skill levels can ease into learning the basics of building a messaging app with XMTP.
Completing this tutorial doesn't cost you any Ether. At this time, all messaging with XMTP is free. To learn more, see Will XMTP charge messaging fees?
Prerequisites
Be sure to have these prerequisites in place before you start the tutorial:
Node (LTS version) and npm to install app requirements and dependencies
Access to Chrome, Firefox, or Brave. The "hello world" app is designed to work with these browsers.
A wallet app browser extension installed, such as MetaMask or Coinbase Wallet, and an Ethereum account
For example, you can install the MetaMask wallet app browser extension and use it to create an Ethereum account you can use to send and receive XMTP messages. To learn more, see How to create a MetaMask Wallet.
Beyond the purposes of this "hello world" tutorial, XMTP can be used with more than just Ethereum accounts and Metamask or Coinbase Wallet. To learn more, see Wallet apps and blockchains supported by XMTP.
A code editor of your choice that you can use to build the app
Step 1. Create a vanilla React app
In this step, you create a React app using the Create React App tool to easily set up your developer environment and provide the foundation of your "hello world" app.
The command you run generates all of the directories and files you need to create a vanilla React application and run it in your browser.
In subsequent steps, you add code to this vanilla React app to build each feature of your "hello world" app.
To create and run a vanilla React app:
To create the React app, run:
npx create-react-app my-app --scripts-version 4.0.2This creates the React app in a
my-appdirectory.To run the vanilla React app, run:
cd my-app
npm start
The app opens at
localhost:3000in your default browser.
Before you start the next section, stop the app running in your CLI. To do this, press Ctrl+C.
Step 2. Build a Connect wallet button
Your "hello world" app needs a Connect wallet button that enables you to connect a wallet app, such as MetaMask.
This app uses Web3Modal and Ethers to connect to commonly used wallet apps.
Before starting this task, be sure to have a wallet app browser extension installed, such as MetaMask or Coinbase Wallet, and an Ethereum account. To learn more, see Prerequisites.
Install Web3Modal. In the
my-appdirectory, run:npm i web3modalThis adds the Web3Modal dependency to your
package.json.Install Ethers. In the
my-appdirectory, run:npm i ethersThis adds the Ethers dependency to your
package.json.In the existing
my-app/srcdirectory, create acontextsdirectory. In thecontextsdirectory, create a file namedWalletContext.js.This code provides the Web3Modal and Ethers functionality your "hello world" app needs to enable you to connect your wallet app.
Copy this code block and paste it into the file:
import { createContext, useState } from "react";import Web3Modal from "web3modal";import { ethers } from "ethers";export const WalletContext = createContext();export const WalletContextProvider = ({ children }) => {const [walletAddress, setWalletAddress] = useState(null);const [signer, setSigner] = useState(null);const connectWallet = async () => { const instance = await web3Modal.connect(); const web3Provider = new ethers.providers.Web3Provider(instance, "any"); const newSigner = await web3Provider.getSigner(); setSigner(newSigner); setWalletAddress(await newSigner.getAddress()); instance.on("accountsChanged", () => { disconnectWallet(); }); instance.on("connect", () => { connectWallet(); }); instance.on("disconnect", () => { disconnectWallet(); });};const disconnectWallet = () => { setWalletAddress(null); setSigner(null);};const providerOptions = {};const web3Modal = new Web3Modal({ cacheProvider: true, // optional providerOptions, // required});return ( <WalletContext.Provider value={{ connectWallet, disconnectWallet, walletAddress, signer, }} > {children} </WalletContext.Provider> );};To learn more about Context in React, see Context.
In the
my-app/srcdirectory, update the existingApp.jsfile to use theWalletContextyou just created, add the Connect wallet button UI element, and remove elements of the vanilla React app.To do this, copy this code block and paste it into the file, replacing all existing code. For reference, lines with code changes are highlighted.
import { useContext } from 'react';import './App.css';import { WalletContext } from './contexts/WalletContext';function App() { const { connectWallet } = useContext(WalletContext); return ( <div className="App"> <button onClick={connectWallet}>Connect wallet</button> </div> );}export default App;In the
my-app/srcdirectory, update the existingindex.jsfile to import theWalletContextProvideryou created in a previous step and wrap it around your<App />. This enables your app to access information provided by the wallet app context.Also, import and use
Bufferto help support message streaming, which you build in a subsequent step.To do this, copy this code block and paste it into the file, replacing all existing code. For reference, lines with code changes are highlighted.
import React from "react";import ReactDOM from "react-dom/client";import { Buffer } from "buffer";import "./index.css";import App from "./App";import reportWebVitals from "./reportWebVitals";import { WalletContextProvider } from "./contexts/WalletContext";window.Buffer = Buffer;const root = ReactDOM.createRoot(document.getElementById("root"));root.render( <React.StrictMode> <WalletContextProvider> <App /> </WalletContextProvider> </React.StrictMode>);// If you want to start measuring performance in your app, pass a function// to log results (for example: reportWebVitals(console.log))// or send to an analytics endpoint. Learn more: https://bit.ly/CRA-vitalsreportWebVitals();In the
my-appdirectory, runnpm startto start your "hello world" app.A Connect wallet button replaces the vanilla Learn React UI.
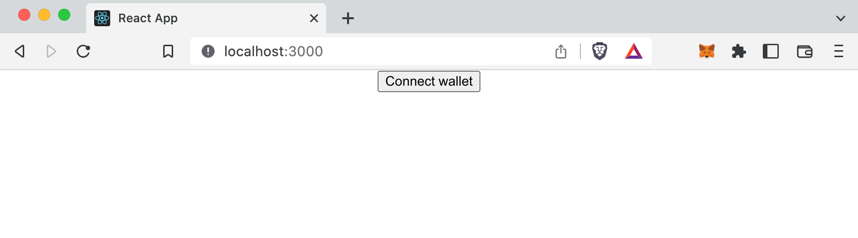
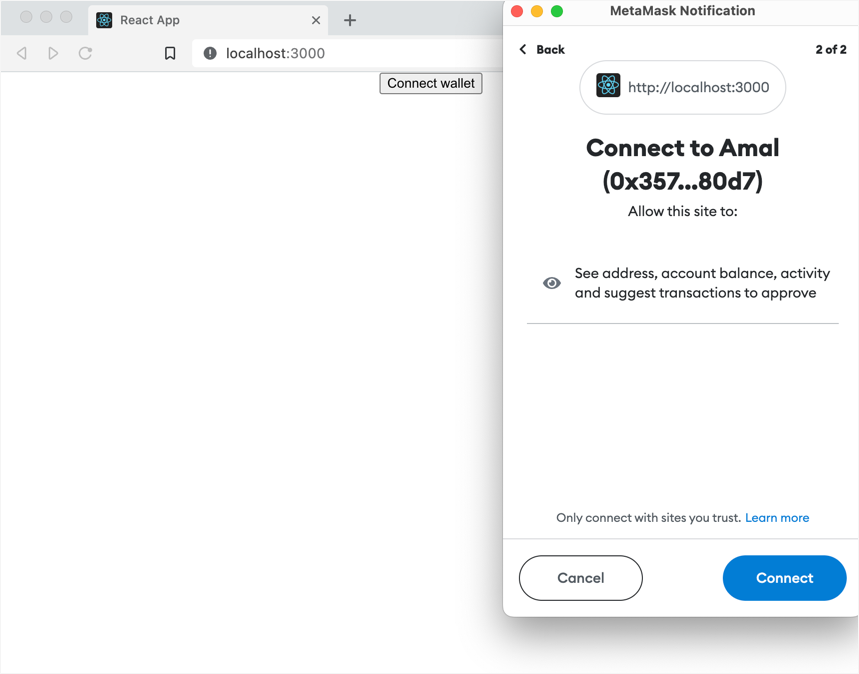
Click the Connect wallet button to open your wallet app browser extension and connect a blockchain account to the app.
Your "hello world" app UI doesn't change. However, in your wallet app you can see that your account is now connected to your "hello world" app running at
localhost:3000: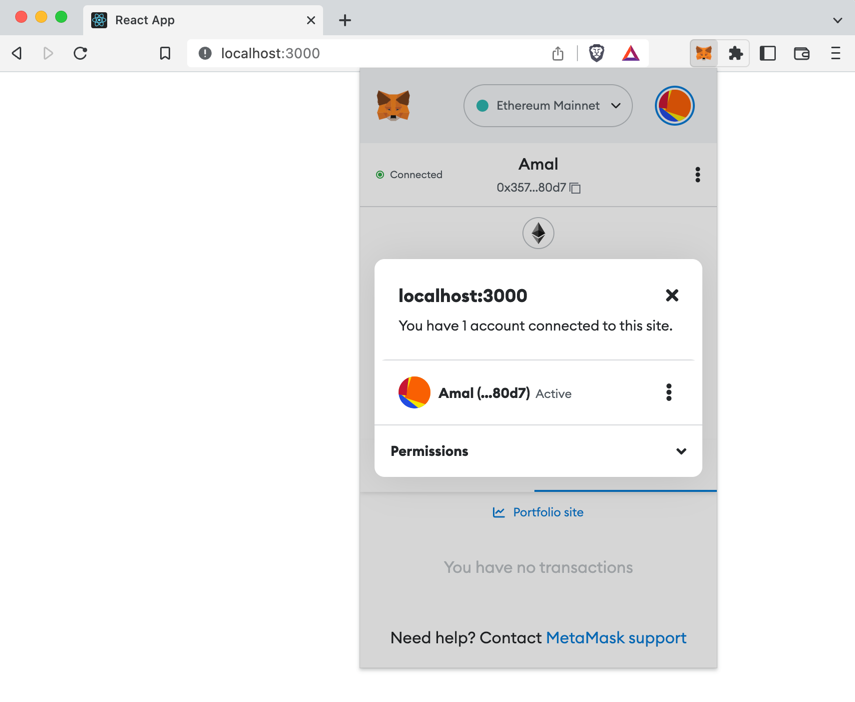
Before you start the next section, stop the app running in your CLI. To do this, press Ctrl+C.
Step 3. Build the Connect to XMTP button
To send and receive XMTP messages, you must create an XMTP identity associated with your blockchain account. An app built with XMTP must give the user a way to create this identity and use it to connect to the XMTP network. Specifically, the user must:
Sign to create an XMTP identity the first time they use an app built with XMTP (like creating an account).
Sign to enable their XMTP identity the first and any subsequent time they start a new messaging session (like providing an account password).
To learn more about creating and enabling an XMTP identity, see Sign to send and receive messages using apps built with XMTP.
Your "hello world" app uses a Connect to XMTP button to enable you to provide these account signatures and connect to the XMTP network.
To build the Connect to XMTP button:
Install the XMTP client SDK for JavaScript.
The SDK provides an XMTP message API client that enables your "hello world" app to communicate with the XMTP network. In the
my-appdirectory, run:npm i --save @xmtp/xmtp-jsThis command adds the
@xmtp/xmtp-jsdependency to yourpackage.json.In the existing
my-app/src/contextsdirectory, create a file namedXmtpContext.js.This code provides the XMTP functionality your "hello world" app needs to initiate the XMTP messaging API client and use it to communicate with the XMTP network to send and retrieve messages.
infoIn this code block,
env: "production"connects your "hello world" app to the XMTPproductionnetwork. This means that the "gm" messages you send with the app are accessible using only apps that are connected to the XMTPproductionnetwork. To learn more about working with XMTP network environments, see XMTP production and dev network environments.Copy this code block and paste it into the file:
import React, { useState, createContext, useEffect, useContext } from "react";import { Client } from "@xmtp/xmtp-js";import { WalletContext } from "./WalletContext";export const XmtpContext = createContext();export const XmtpContextProvider = ({ children }) => { const { signer, walletAddress } = useContext(WalletContext); const [providerState, setProviderState] = useState({ client: null, initClient: () => {}, loadingConversations: true, conversations: new Map(), convoMessages: new Map(), }); const initClient = async (wallet) => { if (wallet && !providerState.client) { try { const client = await Client.create(wallet, { env: "production" }); setProviderState({ ...providerState, client, }); } catch (e) { console.error(e); setProviderState({ ...providerState, client: null, }); } } }; const disconnect = () => { setProviderState({ ...providerState, client: null, conversations: new Map(), convoMessages: new Map(), }); }; useEffect(() => { signer ? setProviderState({ ...providerState, initClient }) : disconnect(); // eslint-disable-next-line }, [signer]); useEffect(() => { if (!providerState.client) return; const listConversations = async () => { console.log("Listing conversations"); setProviderState({ ...providerState, loadingConversations: true }); const { client, convoMessages, conversations } = providerState; const convos = await client.conversations.list(); Promise.all( convos.map(async (convo) => { if (convo.peerAddress === "0x937C0d4a6294cdfa575de17382c7076b579DC176") { let messages = convoMessages.get(convo.peerAddress); if (!messages) { messages = await convo.messages(); convoMessages.set(convo.peerAddress, messages); setProviderState({ ...providerState, convoMessages, }); } conversations.set(convo.peerAddress, convo); setProviderState({ ...providerState, conversations, }); } }) ).then(() => { setProviderState({ ...providerState, loadingConversations: false }); }); }; listConversations(); // eslint-disable-next-line }, [providerState.client]); return ( <XmtpContext.Provider value={[providerState, setProviderState]}> {children} </XmtpContext.Provider> );};In the
my-app/srcdirectory, update the existingApp.jsfile to use theXmtpContextyou just created and add the Connect to XMTP button UI element.To do this, copy this code block and paste it into the file, replacing all existing code. For reference, lines with code changes are highlighted.
import { useContext } from "react";import "./App.css";import { WalletContext } from "./contexts/WalletContext";import { XmtpContext } from "./contexts/XmtpContext";function App() { const { connectWallet, walletAddress, signer } = useContext(WalletContext); const [providerState] = useContext(XmtpContext); return ( <div className="App"> {walletAddress ? ( <div className="wrapper"> {!providerState.client ? ( <button className="btn" onClick={() => providerState.initClient(signer)} > Connect to XMTP </button> ) : ( <p>Connected: {walletAddress}</p> )} </div> ) : ( <button onClick={connectWallet}>Connect wallet</button> )} </div> );}export default App;In the
my-app/srcdirectory, update the existingindex.jsfile to import theXmtpContextProvideryou created in a previous step and wrap it around your app.This enables your app to access information provided by the XMTP context. Note that
XmtpContextProvideris nested inWalletContextProviderbecause it needs access to the information provided by the wallet app context.To do this, copy this code block and paste it into the file, replacing all existing code. For reference, lines with code changes are highlighted.
import React from "react";import ReactDOM from "react-dom/client";import { Buffer } from "buffer";import "./index.css";import App from "./App";import reportWebVitals from "./reportWebVitals";import { WalletContextProvider } from "./contexts/WalletContext";import { XmtpContextProvider } from "./contexts/XmtpContext";window.Buffer = Buffer;const root = ReactDOM.createRoot(document.getElementById("root"));root.render( <React.StrictMode> <WalletContextProvider> <XmtpContextProvider> <App /> </XmtpContextProvider> </WalletContextProvider> </React.StrictMode>);// If you want to start measuring performance in your app, pass a function// to log results (for example: reportWebVitals(console.log))// or send to an analytics endpoint. Learn more: https://bit.ly/CRA-vitalsreportWebVitals();In the
my-appdirectory, runnpm startto start your "hello world" app. Click Connect wallet to connect your wallet app. The following UI appears: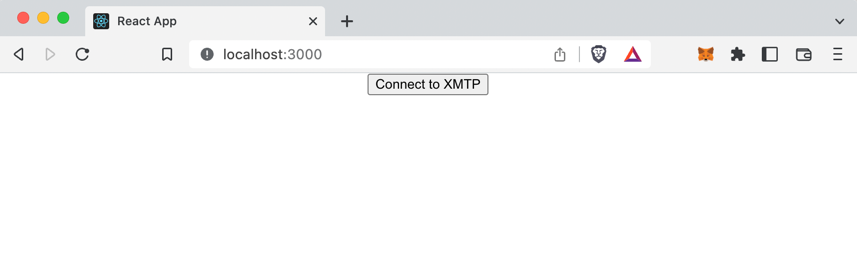
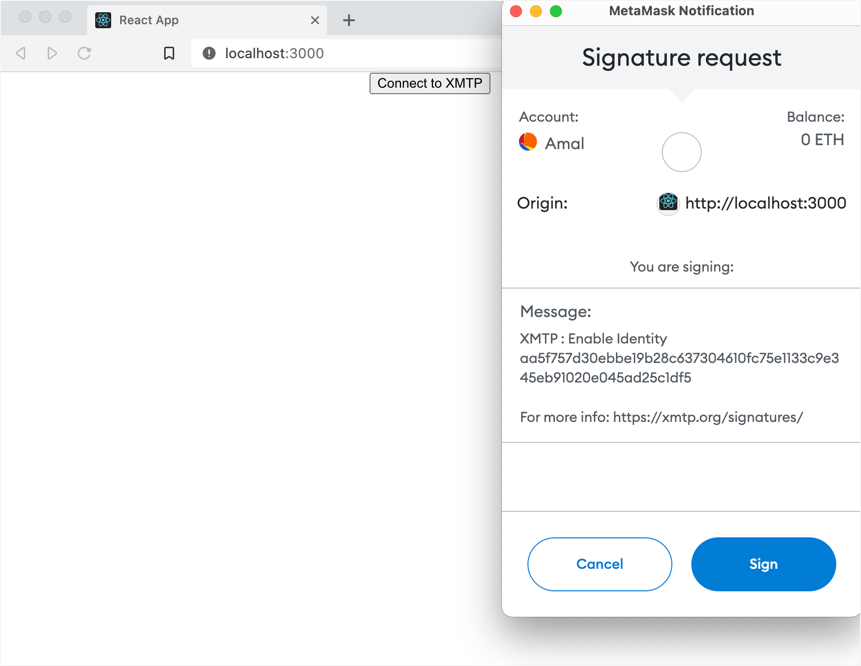
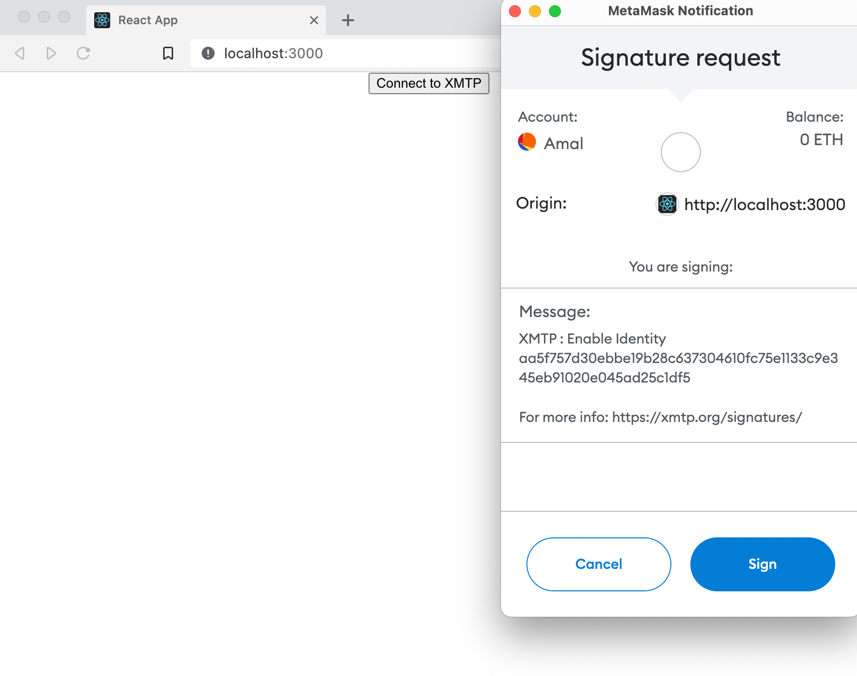
Click Connect to XMTP to use your desired wallet app to create an XMTP identity (if you don't already have one) and enable your XMTP identity.
For example, here is the MetaMask Signature request screen for signing to enable an XMTP identity.
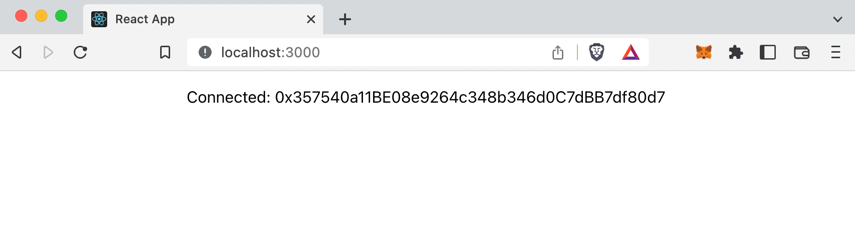
Your "hello world" app now shows your blockchain account connected to the XMTP network:
Before you start the next section, stop the app running in your CLI. To do this, press Ctrl+C.
Step 4. Build the Send gm button, display messages, and stream new messages
Now that the XMTP identity associated with your blockchain account is connected to the XMTP network, you can send and receive messages with XMTP.
For simplicity, your "hello world" app enables you to send a preconfigured "gm" message (hello world) to an XMTP message bot that is programmed to automatically reply to an address it receives a message from. This makes it easy for you to immediately see the outcome of sending a message.
In the
my-app/srcdirectory, create ahooksdirectory. In thehooksdirectory, create a file nameduseStreamMessages.js.The purpose of the
useStreamMessageshook is to enable your "hello world" app to listen for and display (stream) new messages as they become available.Copy this code block and paste it into the file:
import { useContext, useEffect, useState } from "react";import { WalletContext } from "../contexts/WalletContext";import { XmtpContext } from "../contexts/XmtpContext";const useStreamMessages = (peerAddress) => { const [providerState, setProviderState] = useContext(XmtpContext); const { client, convoMessages } = providerState; const [stream, setStream] = useState(""); const [conversation, setConversation] = useState(null); useEffect(() => { const getConvo = async () => { if (!client || !peerAddress) { return; } setConversation(await client.conversations.newConversation(peerAddress)); }; getConvo(); }, [client, peerAddress]); useEffect(() => { if (!conversation) return; const streamMessages = async () => { const newStream = await conversation.streamMessages(); setStream(newStream); for await (const msg of newStream) { if (setProviderState) { const newMessages = convoMessages.get(conversation.peerAddress) ?? []; newMessages.push(msg); const uniqueMessages = [ ...Array.from( new Map(newMessages.map((item) => [item["id"], item])).values() ), ]; convoMessages.set(conversation.peerAddress, uniqueMessages); setProviderState({ ...providerState, convoMessages: new Map(convoMessages), }); } } }; streamMessages(); return () => { const closeStream = async () => { if (!stream) return; await stream.return(); }; closeStream(); }; // eslint-disable-next-line }, [convoMessages, peerAddress, conversation]);};export default useStreamMessages;In the
my-app/srcdirectory, update the existingApp.jsfile to add asendMessageconstant, which sends the gm XMTP bot! message to the XMTP message bot. Then create the Send gm button UI element that, when clicked, usessendMessageto send the gm XMTP bot! message.Also, enable the app to display existing messages and stream new messages using the
useStreamMessageshook you just created.To do this, copy this code block and paste it into the file, replacing all existing code. For reference, lines with code changes are highlighted.
import { useContext, useEffect, useState } from "react";import "./App.css";import { WalletContext } from "./contexts/WalletContext";import { XmtpContext } from "./contexts/XmtpContext";import useStreamMessages from "./hooks/useStreamMessages";function App() { const { connectWallet, walletAddress, signer } = useContext(WalletContext); const [providerState, setProviderState] = useContext(XmtpContext); const { convoMessages, client } = providerState; const [peerAddress] = useState("0x937C0d4a6294cdfa575de17382c7076b579DC176"); useStreamMessages(peerAddress); const sendMessage = async () => { const message = "gm XMTP bot!"; if (!client || !walletAddress) { return; } const conversation = await client.conversations.newConversation(peerAddress); if (!conversation) return; await conversation.send(message); }; const [newMessages, setNewMessages] = useState([]); useEffect(() => { if (!convoMessages || !peerAddress) { return; } let newMessages = convoMessages.get(peerAddress); if (!newMessages) { newMessages = []; convoMessages.set(peerAddress, newMessages); } setNewMessages(newMessages); }, [convoMessages, peerAddress]); return ( <div className="App"> {walletAddress ? ( <div className="wrapper"> {!providerState.client ? ( <button className="btn" onClick={() => providerState.initClient(signer)} > Connect to XMTP </button> ) : ( <> <p>Connected: {walletAddress}</p> <button className="btn" onClick={sendMessage}> Send gm </button> <div className="msg-container"> {convoMessages && convoMessages.get(peerAddress)?.map((msg) => { return ( <div className="msg" key={msg.id}> {msg.content} </div> ); })} </div> </> )} </div> ) : ( <button onClick={connectWallet}>Connect wallet</button> )} </div> );}export default App;In the
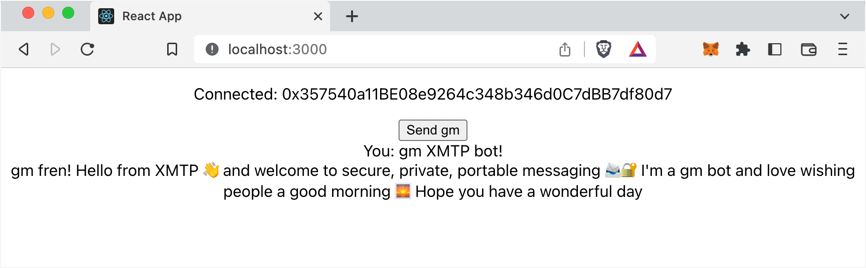
my-appdirectory, runnpm startto start your "hello world" app. Click Connect wallet to connect your wallet app. Click Connect to XMTP and sign to enable your XMTP identity. The following UI appears:infoIf you've used your connected account to send XMTP messages to the XMTP message bot on the XMTP
productionnetwork in the past, the messages appear in your "hello world" app.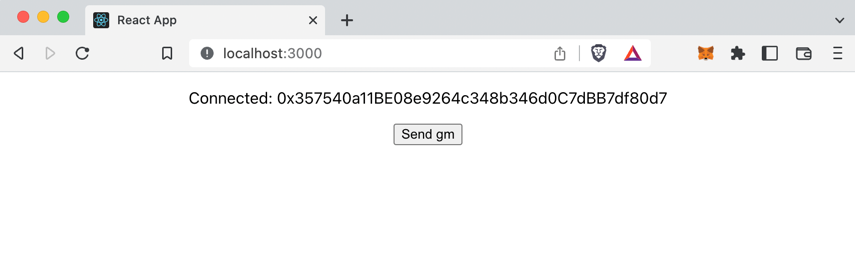
Click Send gm. The sent gm XMTP bot! message appears. Within a few seconds, a message from the XMTP bot displays.
Congratulations on building your own XMTP "hello world" app and sending and receiving your first message with it!
Learn more
Now that you've had a "hello world" introduction to building with XMTP, here are some resources to help you continue building with XMTP:
Learn more about the XMTP client SDK for JavaScript, including more details about the XMTP functions used in the code samples in this tutorial.
Explore XMTP chat apps with more features than the XMTP "hello world" app:
An example React chat app you can use as a developer tool to learn how to build a basic 1:1 chat app using the XMTP client SDK. The app is intentionally streamlined and unopinionated, making it a good quickstart launching point for building with XMTP.
An example React chat app that demonstrates both basic and advanced features of the XMTP client SDK.
Learn about XMTP development concepts